Part I | The Discovery
I’m going to try to talk through this project chronologically, and with lots of photos, but it’s going to be a three-part post because this is a lot of information to parse through and share.
Full transparency, this project took about four years to complete, from start to finish.
I feel like we’ve touched on this before, but here’s a quick refresh of the 3 R’s for reference.
Here’s a short list of what I tackled during this restoration project:
- Stripped and refinished the crown molding and baseboards.
- Removed the archway and restored the original transition between the living room and dining room.
- Restored and reinstalled original trim found in the basement.
- Repaired plaster walls.
- Uncovered, rewired, and reinstalled wall sconces in their original position in the dining room.
- Refinished the floors.
- Replaced pieces of missing trim with salvaged trim.
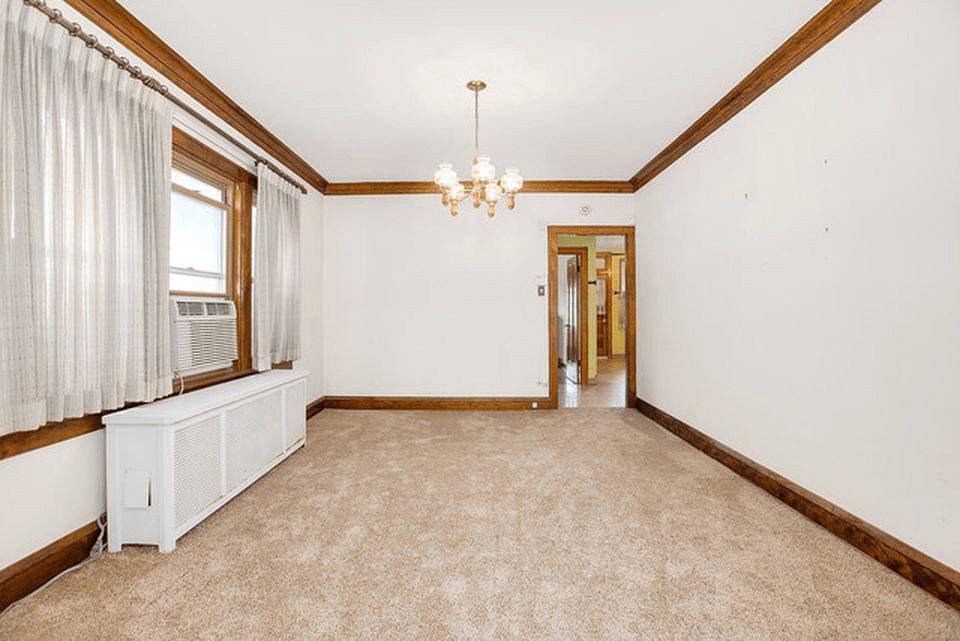
As always, you can see the end results here.
While the official project began at the end of 2018, the first piece of this restoration puzzle was discovered by our realtor in 2016 during our final walk through right before closing. He pointed out the trim stashed between the floor joists in the ceiling of the basement, “Did you notice this?”

I had no prior knowledge of the interiors of Chicago bungalows…this was my first one, but my initial impression was that the mill work in the basement probably belonged in the kitchen which was the most visibly altered room of the house. I proceeded with this assumption for the next few years and left the stashed trim untouched until we were ready to tackle a kitchen renovation.

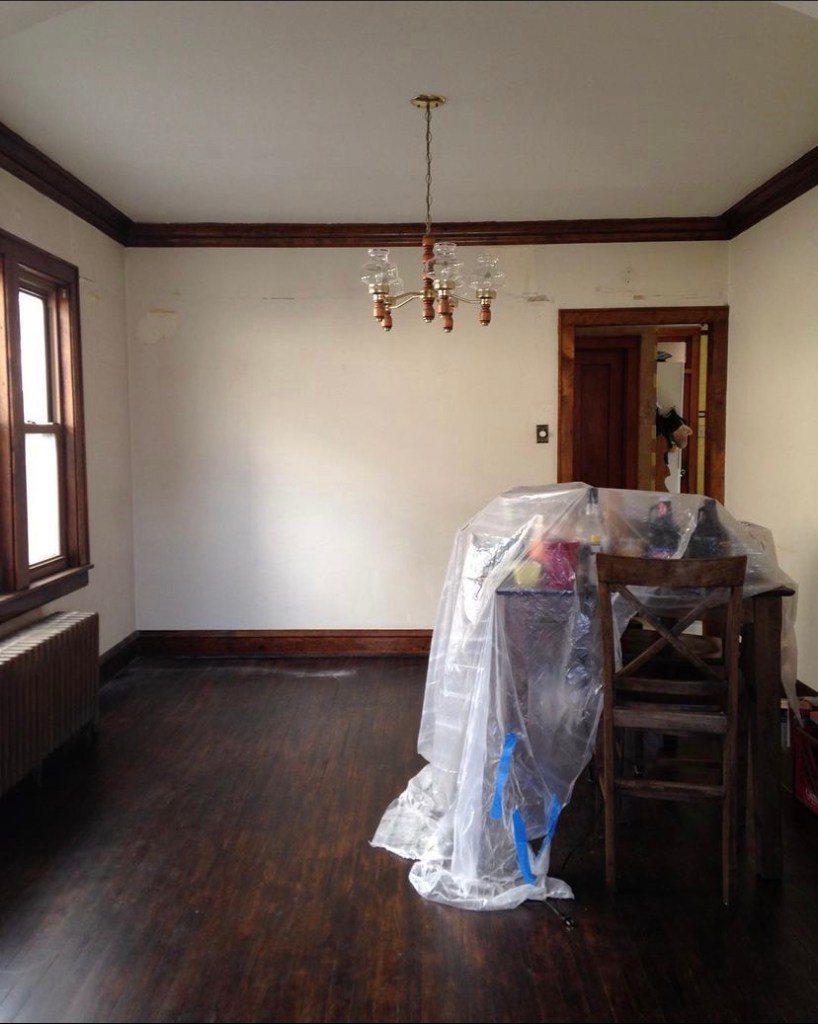

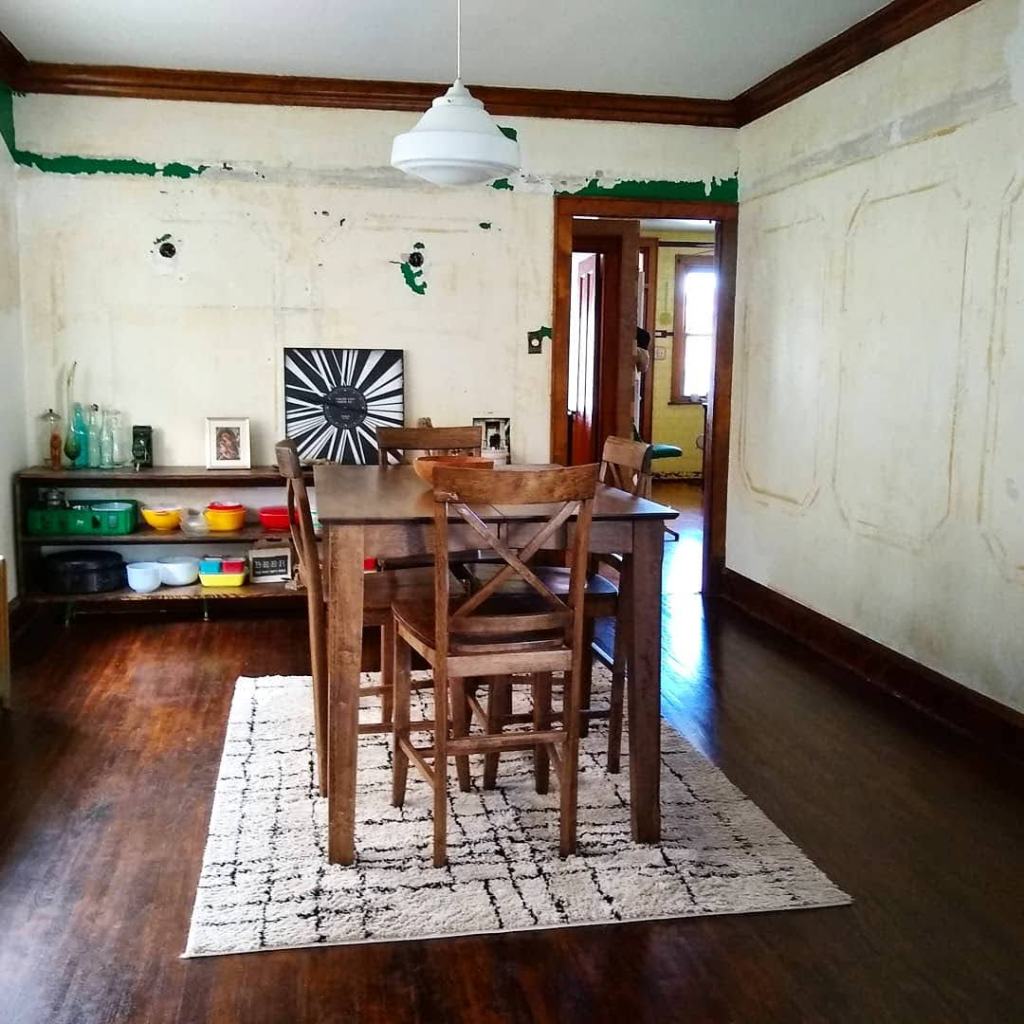
Fast forward to New Year’s Eve of 2018, after removing a failed attempt at a gallery wall, I decided to ring in the new year with a small project to help the house feel more “put together.” As I began prepping the wall for patching and new paint, chunks of old wall coatings began to fail, exposing the bare plaster walls.

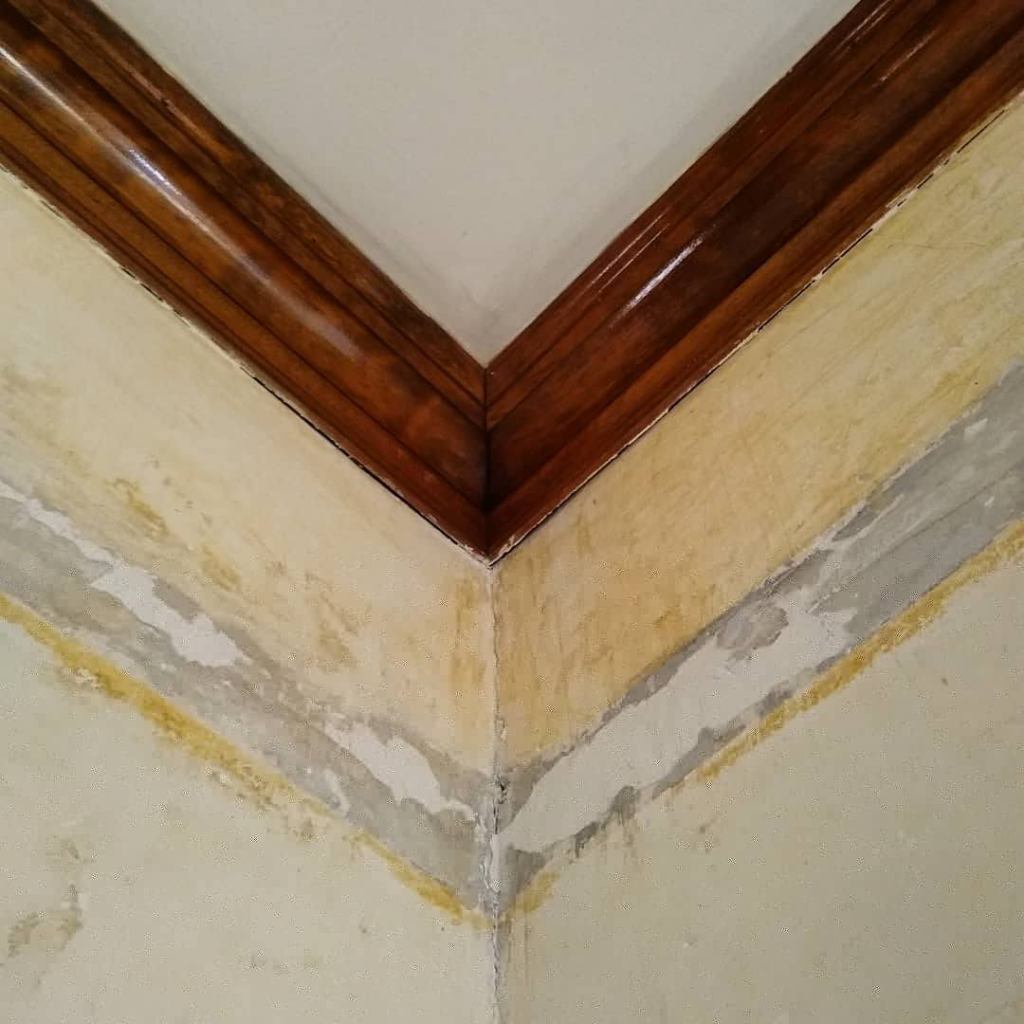
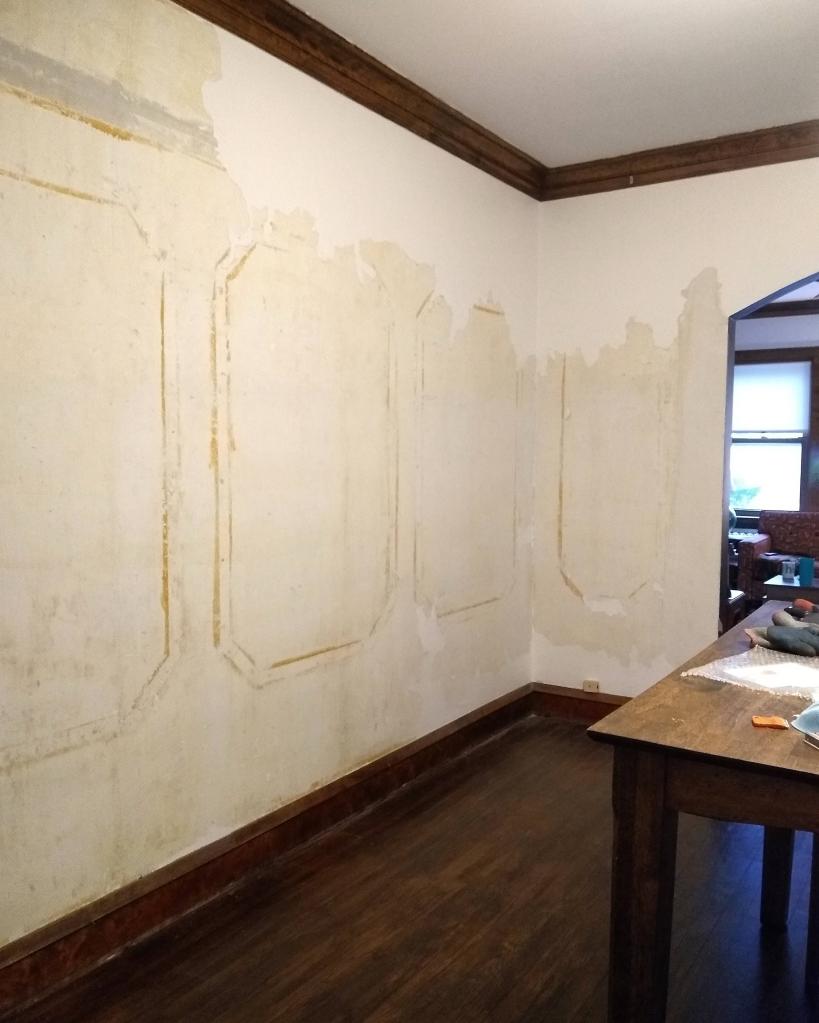
This revealed ghost marks from where original trim had been installed on the walls, surrounded by wallpaper, and then removed. It also revealed the locations of the original wall sconces that had been filled in with plaster and surely weren’t electrified still…they couldn’t be (they were).

I went down to the basement to un-stash the trim. Easier said than done considering there were four pieces the exact circumference of the dining room, and I still have no idea how they got it up there or how we got it back down.
It didn’t take much to confirm that the dining room was where the stashed trim had originated from. But I did also find kitchen trim and the door jamb to our original pantry in the pile as well.


And while in hindsight it seems like an obvious choice that we would restore everything in the dining room back to its original condition…it wasn’t an easy conclusion to come to. It was clear from the wall coating failure that I was going to have to address areas where the plaster was failing and cracking. And it was obvious we were going to have to address those live wires where the sconces used to be. But I needed to do more research. If the dining room had this trim, did the living room have it too at some point? And if so, why would they save the trim in one room and not the other?
I had some unexpected and big decisions to make and I didn’t feel prepared to do so. Obviously I would be doing the work (I got us into this mess in the first place), but could I do this work? I needed more time to think and I needed to do more research.

Leave a comment