Below is the blog post I wrote when my dining room refinishing project first began, originally published in January 2019. Reading through this post today, I sound much more optimistic about this project then I remember feeling at the time. It was really tough getting so close to a finish line only to feel like I was placed back at the beginning again. Although I was presented with an amazing restoration project, this was a bittersweet discovery for me. I’ll talk more about those conflicting emotions in Part I, II and III of this ongoing series.
The original post has been edited for length and clarity.
I began a simple project on New Year’s Eve. Ok, I began what I THOUGHT was a simple project on New Year’s Eve.
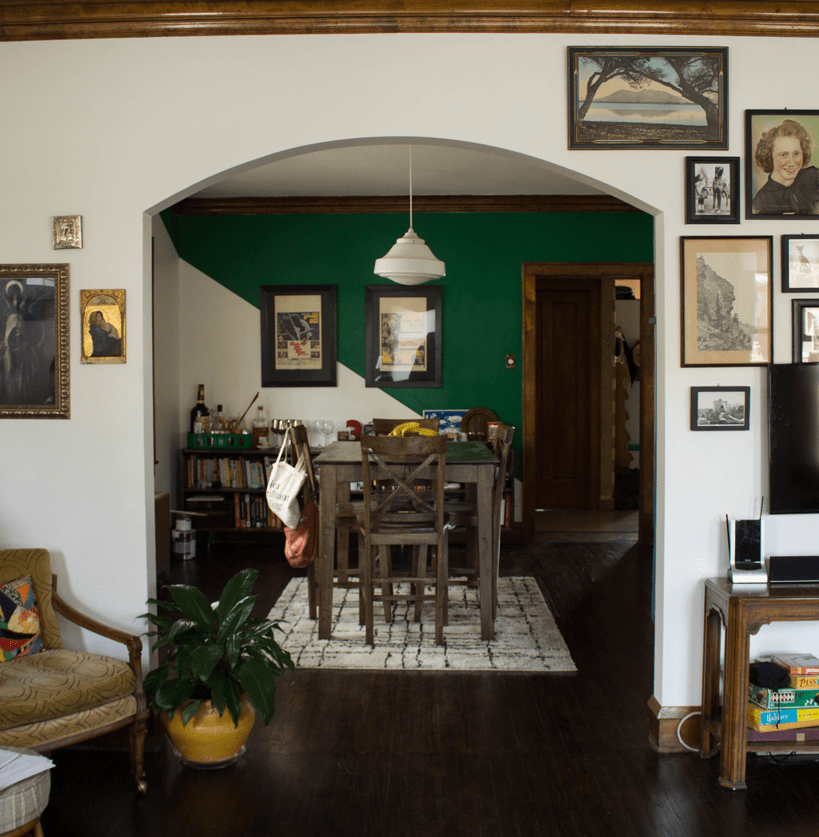
Having refinished the hardwood floors and patched and painted the plaster walls in the living room and dining room less than two years ago, the final project to finish these two rooms was pretty straightforward: refinish the window and baseboard trim and install the new quarter round.
I felt pretty confident that this would be a quick project, especially because I had just spent the end of last summer and into the fall stripping and refinishing trim in the back bedroom. That project taught me what to do when refinishing woodwork, but especially what NOT to do.
*I should note, this would be my second time patching the walls in this dining room. I spent spring break of 2017 patching cracks in the plaster and painting the walls a creamy Palais White (Behr Paint).
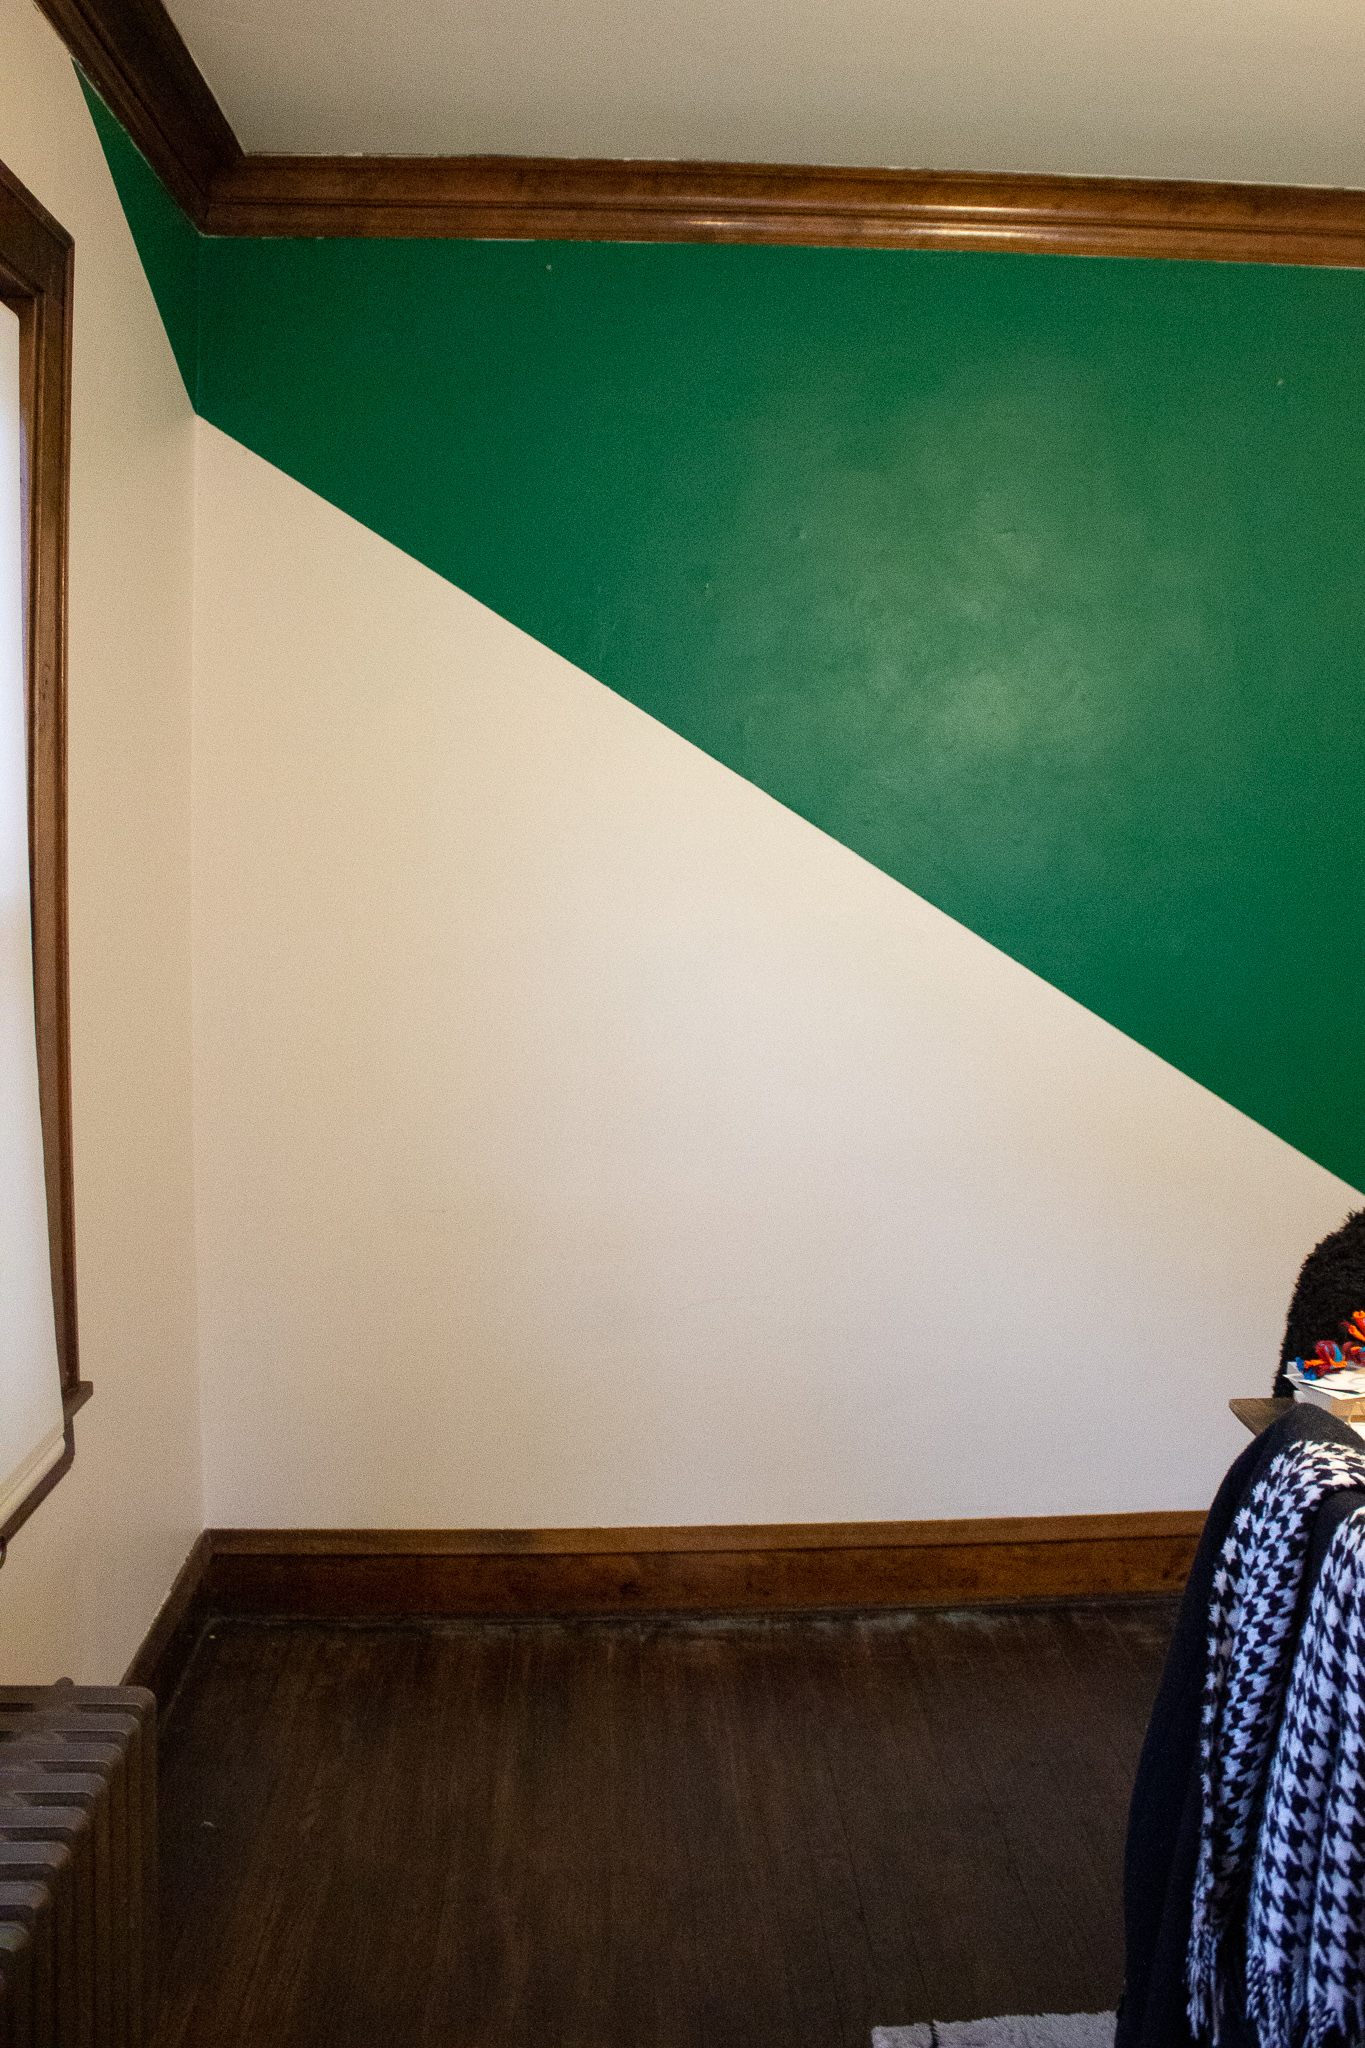
I began by removing some temporary patches I had put in the walls after taking down my first attempt at a gallery wall, in order to do them properly and permanently now that I had the time.
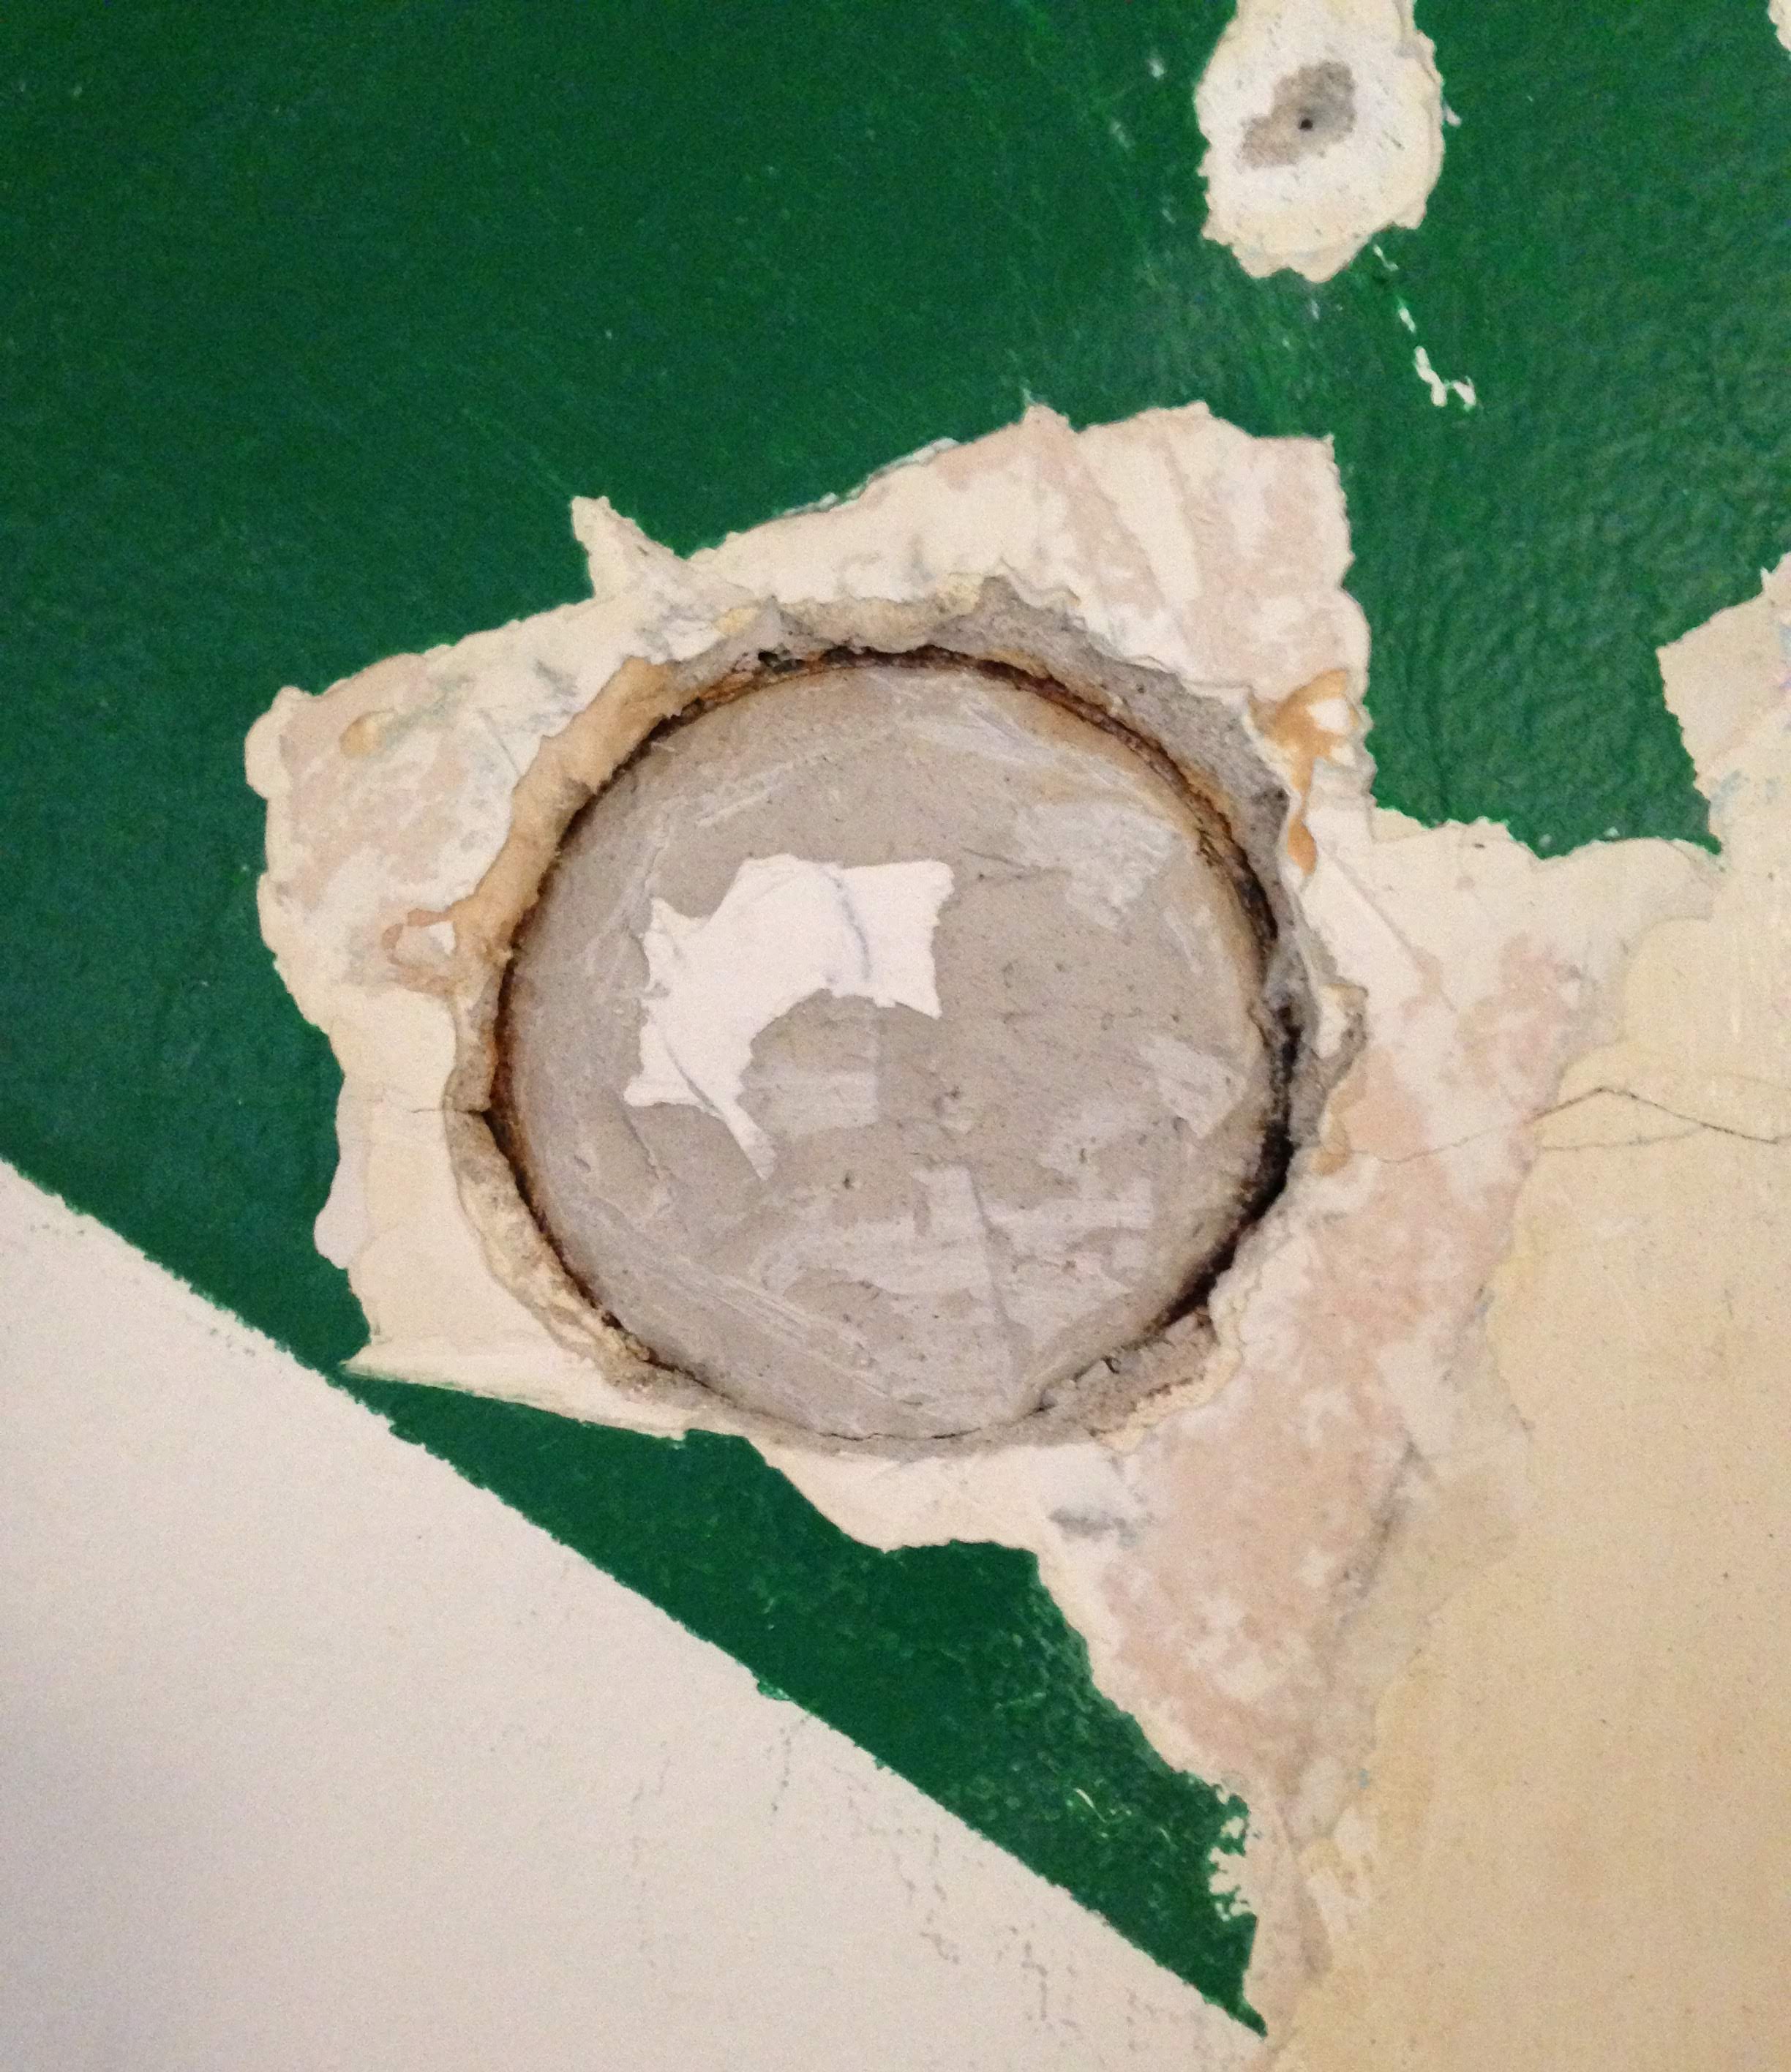
While removing the patches with a chisel, I also decided to uncover the original sconce openings that I knew where hiding under some horribly lumpy patches (not mine this time). My partner and I had gone back and forth, weighing the pros and cons, and then ultimately deciding that whatever we found, we’d take it from there.
It turns out they were pretty easy to uncover. I found the electrical boxes for the sconces under those lumpy patches. Filled with plaster.
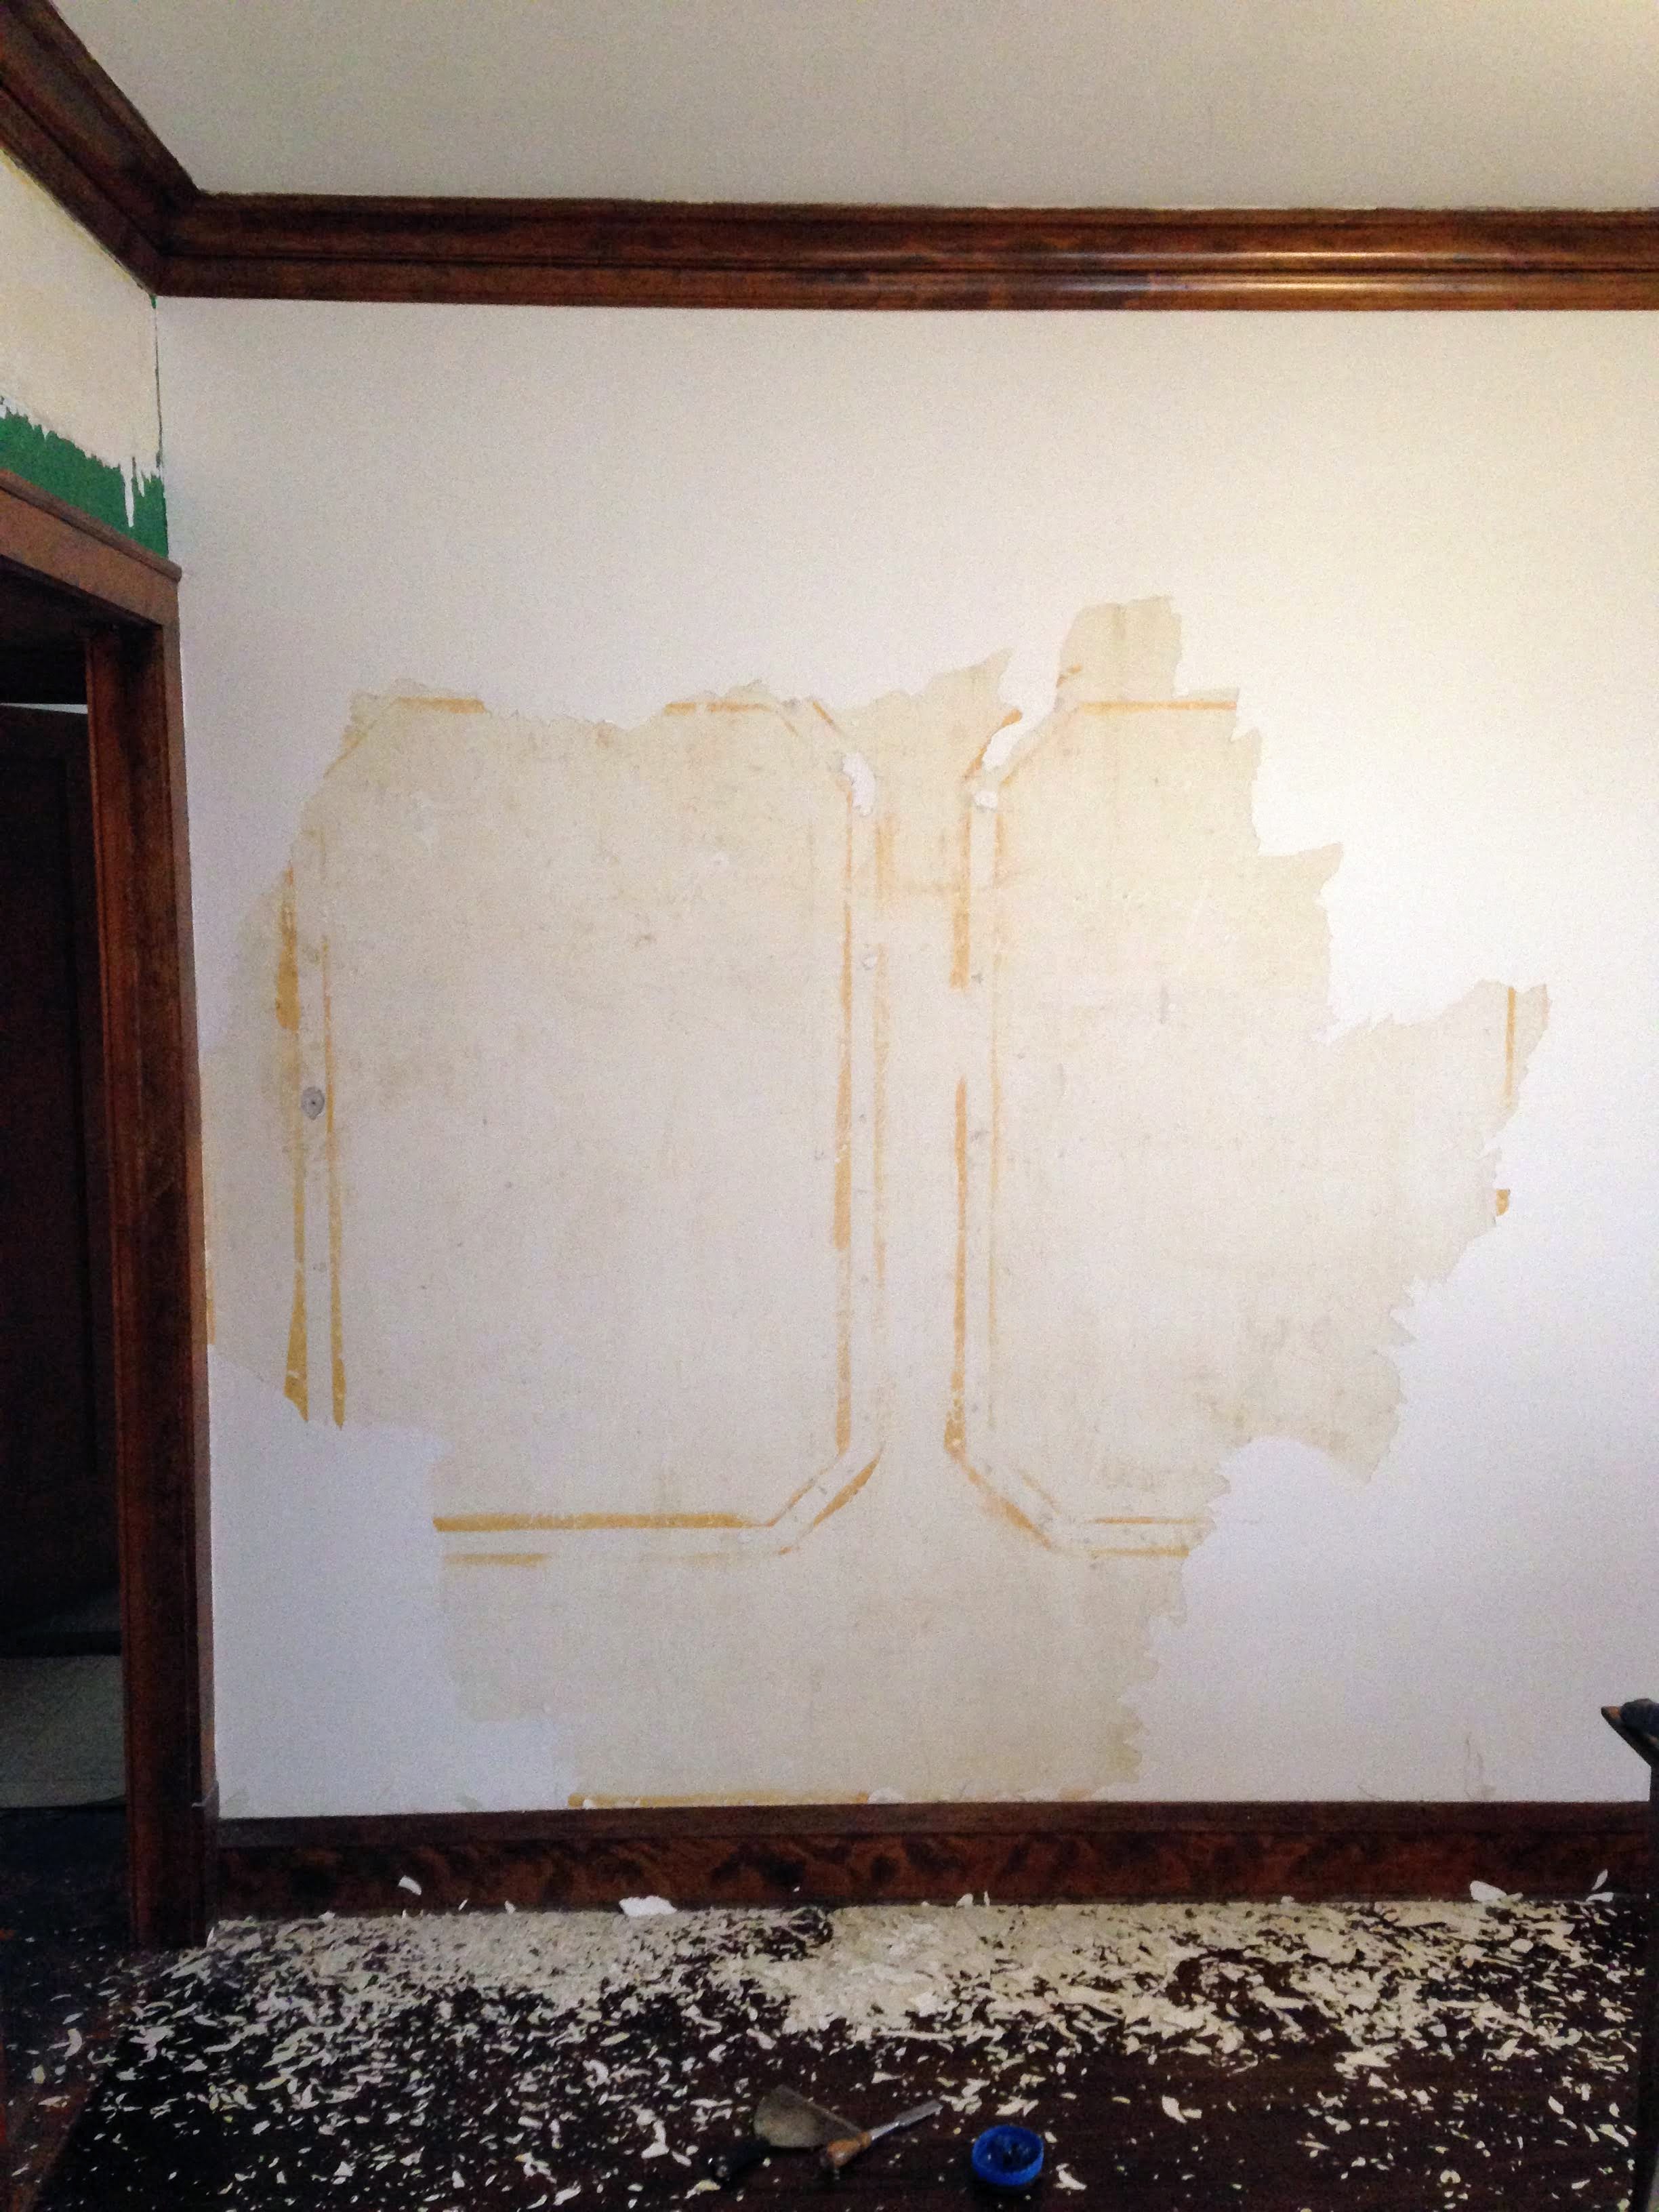
As I began to chisel away at the temporary patches, a funny thing started happening. The paint started coming off the wall in big chunks. Not just the Palais White, but about three other layers of paint underneath it.
To my surprise, I actually began to uncover the remnants of trim. Not actual wood, but where there used to be trim mounted to the walls.
First, it was panel trim. Small strips that outlined large wall panels, with the sconces mounted at the top center of each panel.
Then I found the picture rail.
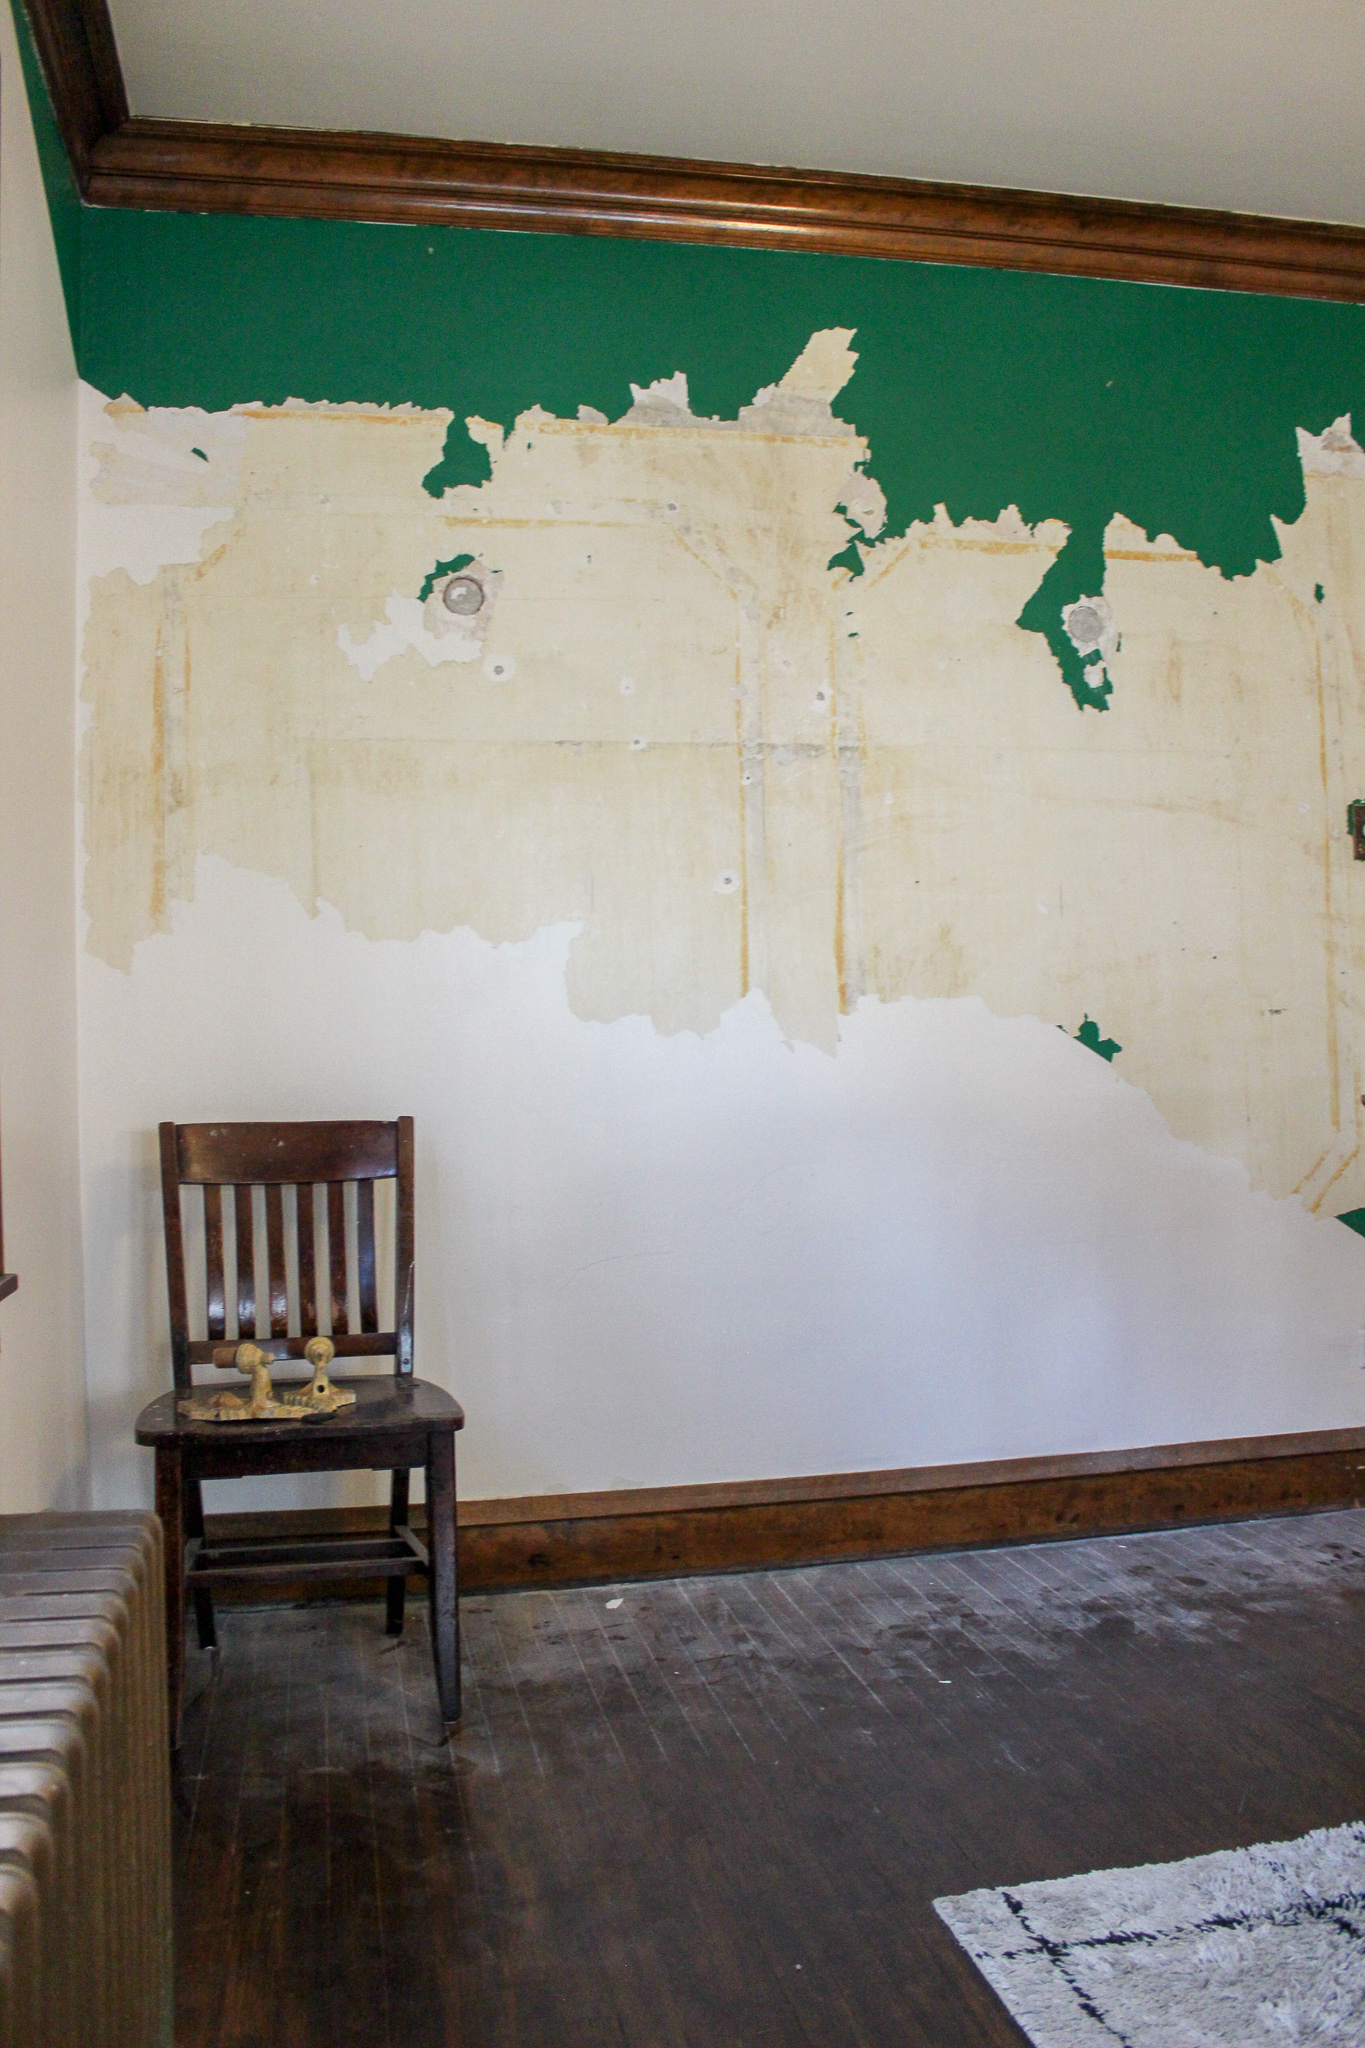
We already have crown molding with picture rail. This picture rail, however, also served as the top piece of trim for our windows. It’s 4.25″ wide and stretches around the entire dining room (and presumably the living room).
This was a shock, to say the least.
I had assumed the trim around our windows was original; I bought the house completely content with how it looked, set on restoring it to its former glory. Now, it seemed, my plans were up in the air.
But where was this phantom wall trim?
I knew about the woodwork hiding between the floor joists in the ceiling of our basement. Our realtor discovered them on inspection day. What I didn’t know was where that trim was removed from. Two obvious guesses were the two rooms that had undergone the most visible changes: the kitchen, bathroom, and the original pantry that no longer existed.
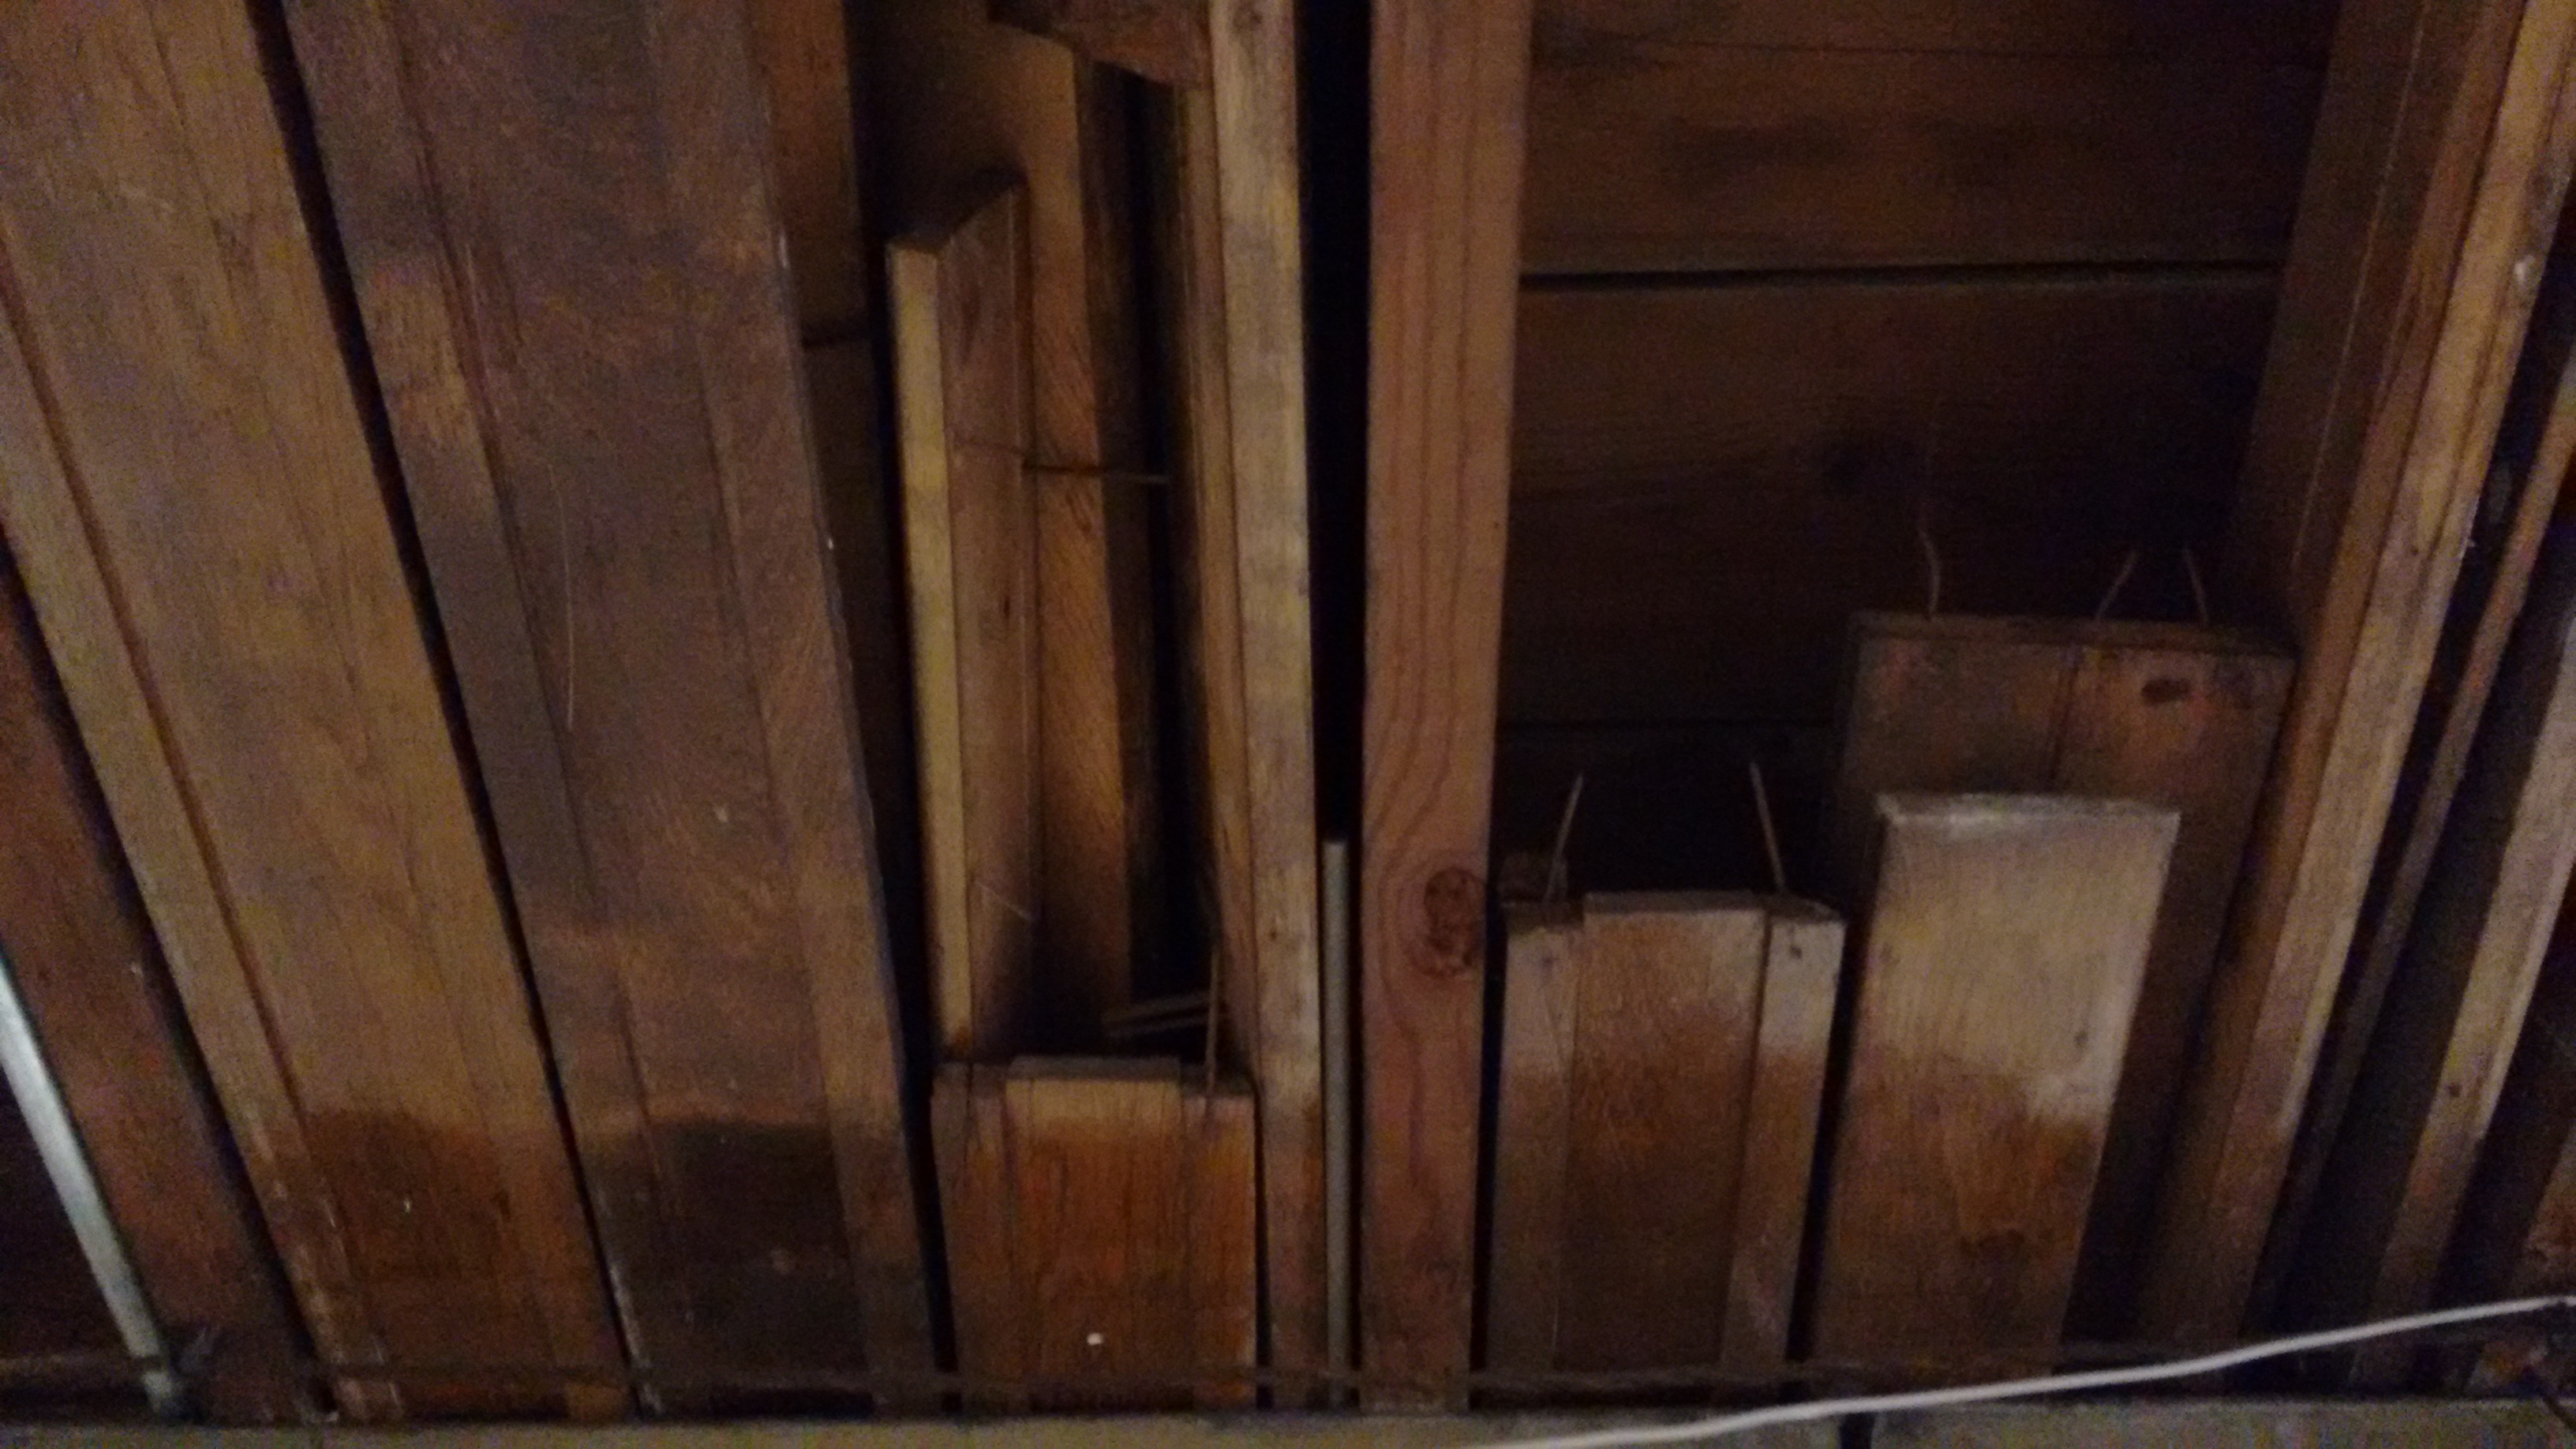
When I finally dug the trim out (I was waiting for a lull in projects to do this) I was partially right: The original pantry trim and door jamb were crammed up there.
But I was really wrong about the rest of it. I found two pieces of panel trim and the rest were the odd piece of wood here and there. But then it started to click. Some of the wood was nearly the width of our house. This was the missing picture rail… at least for the dining room.
It took some effort to get it out, but when we finally did I started trying to piece it all together. That’s when I realized we didn’t just have the picture rail. We also had the casing for the original opening between our living and dining room. And as I suspected, it wasn’t originally an archway.
As exciting as this all was, not all of the pieces fit in my mind. The doorway between the kitchen and dining room is too short for the picture rail… Was there another piece above it? I also found a panel among the saved woodwork that I have no idea where it goes!
The mystery continues… So far, I’ve uncovered six panels in the dining room, the outline of a built-in under the sconces, and… more and more questions.
Removing the paint is a tedious process, much like removing wallpaper without the help of solvents or steam because I don’t want to disturb the markings underneath it. Seeing these panels gave me a flood of inspiration and a renewed excitement for the future of this bungalow. I love working within the constraints of history, and I’m finally ready to embrace the madness of this project.

Leave a comment